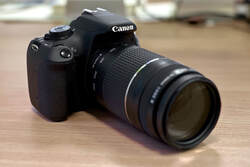
What is a DSLR?
A dslr is a digital camera. You've most likely seen one before and you can get a used one for a reasonable amount of money on gumtree or amazon. This is an example of a dslr:
Can dslr's take photos of the night sky?
Yes they can! You can take great milkyway photos of the night sky with a dslr and tripod. There is a trade off to not having a mount (a mount follows the rotation of the Earth, so you can take long exposures). When you don't have a mount you get a problem called star trails. Star trails are the result of the the earth rotating while your dslr is taking a photo, creating what is called star trails. They can make great photos, but for the purposes of this vlog I'll tell you how to get pin point stars with a dslr and tripod.
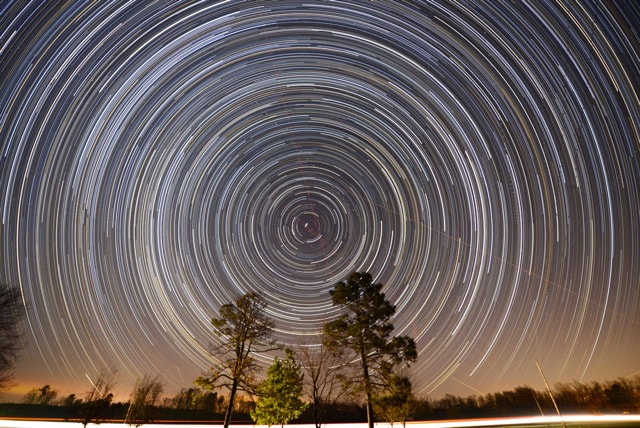
(This is an example of star trails)
How do you find the milkyway?
Certain parts of the milkyway are availble at different times of the year, e.g. The milkyway core:
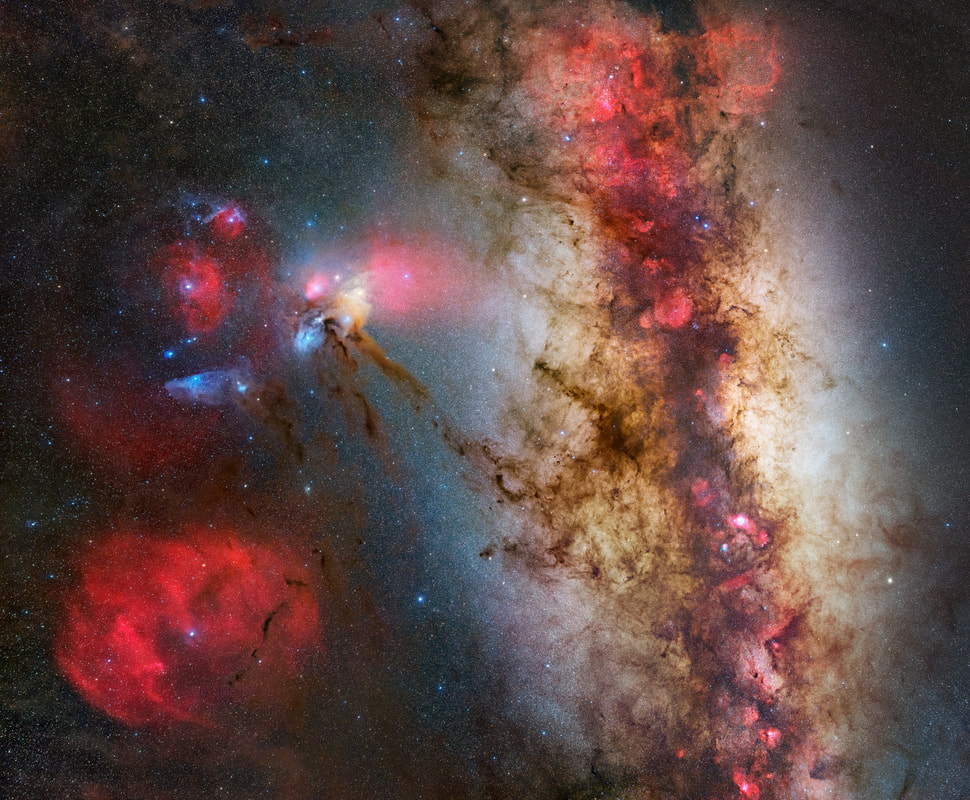
Source: jakobsahnerphotography.com
What I mean by this is that over the year (for example) the milkyway core wouldn't be visible at night because it's behind the sun (this is due to the earth's rovolution around the sun), eventually though it would slowly move further away from the suns position (again due to the revolution of the earth), therefore we'd be able to photograph it at night. This happens over the year as we rotate around the sun. The reason I'm explaining this is because the milkyway core (the densist part of the milkyway and also my favourite part of the mikkyway) might not be available at your time of photographing it.
For the southern hemisphere the milkyway core rises from the east and sets to the west, the best time to photograph it is in June or July (preferably without the moon). For the northern hemisphere the milkyway core rises from the south east the the south west (note: the milkyway is closer to the horizon in the nothern hemisphere). You can also check where the milkyway is on a free app called stellarium, stellarium can help you plan photographs with simulations of the night sky. It also tracks your latitude and longitude, so it knows what your current time is and where you are on the Earth (this affects the way the milkyway rises and sets). You can also see what other smaller things are in the sky for you, e.g the Carina nebula (agian depends where you are the Earth).
For the southern hemisphere the milkyway core rises from the east and sets to the west, the best time to photograph it is in June or July (preferably without the moon). For the northern hemisphere the milkyway core rises from the south east the the south west (note: the milkyway is closer to the horizon in the nothern hemisphere). You can also check where the milkyway is on a free app called stellarium, stellarium can help you plan photographs with simulations of the night sky. It also tracks your latitude and longitude, so it knows what your current time is and where you are on the Earth (this affects the way the milkyway rises and sets). You can also see what other smaller things are in the sky for you, e.g the Carina nebula (agian depends where you are the Earth).
How dark is my sky and how can I measure this?The settings you use depend how dark your sky is. Light pollution is the culprit to the washed out sky, ('
brightening of the night sky caused by street lights and other man-made sources, which has a disruptive effect on natural cycles and inhibits the observation of stars and planets'-says the oxford languages ) This is why you may not see the milkyway. The way people measure light pollution is by using a scale, this scale is called the bortle scale. The bortle scale goes from 1-9, one being the best (absolutely no light pollution) and 9 being the worst (inner city skies). You can also check your bortle scale in lightpollutionmap.com, stellarium, or clear outside. 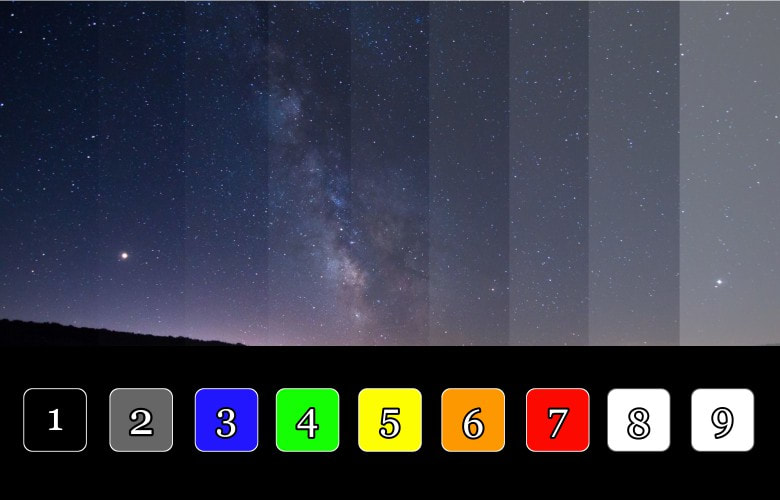
Source: Minoia, Andrea. “What Is the Bortle Scale? Light Pollution Classes Explained.” Https://Nightskypix.com/, nightskypix.com/bortle-scale/. Accessed 5 Sept. 2022.
What is stacking and How do you stack your photos?Now that you've got your images, transfer them to your computer. Now it's time time to stack all your photos, but what is stacking? stacking is the layering of photos to remove noise in your photos, therefore improving the the signal in your photos. Once you've transfered your images, download sequator (this is a free software). Unfortunatley if your running on a mac, then you only have one software available (starry landscape stacker) which is not free (around $40), for my blog I will only share how to stack on sequator. Once you've got sequator, you'll see a red button on the top left hand corner with text beside it that says 'star images', click this and highlight all you milkyway shots (not dark frames) and click open. Next you want to click onto 'noise images'. Collect all your dark frames and click open, these images are going to help the software remove a certain noise called 'hot pixels'. Now you want to click 'output', the output tells sequator where to put the stacked image. Find a folder to put the image in and name it. Once you've done this, (if you don't have a foreground) click 'composition' and set it to 'allign stars', then click select best pixels and set it to a high level. If you have a foreground though then click 'freeze ground' instead of clicking 'select best pixels'. After selecting these settings, you'll notice a red buttom below that says 'sky regeon: full area'. Click this and select irregular mask (this is if you don't have a flat horizon) and you'll see when you hover over the image a circle with a cross hair in the centre. You can change the size of this by scrolling with the mouse. When you left click on the image you'll see a green highlight, you have to highlight the whole sky with this. Try to be as precise as possible when the highlighting the sky (this depends on your patience). When you've done this people with no foreground or a foreground should click on 'Reduce distort effects', then click on complex (complex is suitable for wide lenses). Finally after all this click the big buttom at the bottom left hand corner, that says start. When this is finished you'll have the stacked photo in your folder. After this, edit your photo on something to get your final photo. |
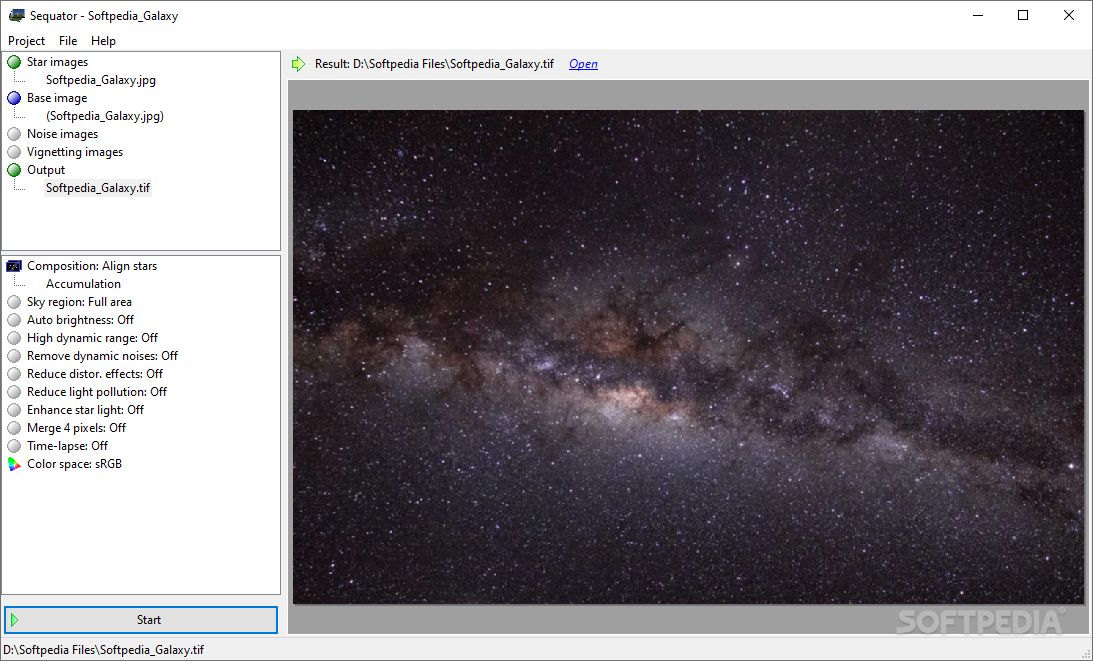
“Download Sequator 1.6.0.” Softpedia, 14 Mar. 2021, www.softpedia.com/get/Multimedia/Graphic/Graphic-Others/Sequator.shtml. Accessed 6 Sept. 2022.
